Showing posts with label Quilts. Show all posts

Wednesday, December 21, 2011

Laura's quilt

I'm working on a quilt for my sister.  This is the fabric. There is one more dark teal fabric that I added after I took the picture.

I've been debating for a while about what layout to use.  She said she is interested in geometric shapes, color, and wants it to be somewhat non-traditional.  I decided on the layout below as a rough design.  I just drew it out several times on graph paper until I liked how it looked and then tried to recreate it in excel.  Each block will be unique.  I've been starting with a selection of the fabrics and then going from there. No real plan.  In some ways it is easier, but it is is also kind of hard because I sit there and stare and try to figure out what to do next.  I had also thought I would make the blocks kind of wonky, but I haven't been very successful at breaking out of my measuring and squaring routine.  I'll have to make an effort to be more carefree in my piecing.  I was hoping to have it done in time to give to her for Christmas, but I've only gotten 3 blocks done in the two days I've had off this week, so that isn't going to happen.  But, at least I'll have made some progress!  I'll update with some pictures of the blocks done so far later.


Monday, June 20, 2011

Owen's car quilt (FINALLY DONE!!!!)

This was going to be an easy project, but I had some problems with it.  Mostly, it stemmed from trying to applique flannel letters.  They were too small and my stitching was too wide so they frayed around the stitching. Then, I couldn't decide how I wanted to fix it.  I finally ended up using my seam ripper to remove the frayed letters, cut new ones, then appliqued them on with a narrower zig-zag through the whole quilt.  It isn't what I wanted to do, but it turned out okay after it was all done.  I like the difference in texture with the flannel and the cotton and the frayed edges.  I hope Owen likes it too!


Monday, January 10, 2011

Owen's car quilt (sneak peek)

I know it has been a long time since I have blogged.  I have been crafting, but I've been lazy about posting...well mostly taking pictures.  For some reason, that can seem like the hardest part sometimes.  Well, anyway, this is a sneak peek at my current project and I'll post some of the other projects I have completed (or at least started) in the last couple of months soon.

These are the first two blocks for a quilt I am making for my friend Jenni's new baby boy Owen!


I have 6 different flannel prints from the same line, and am mixing them with 3 different solids to make 12 blocks.  From each flannel print, I plan to reverse applique it onto the solid and then use the cut out portion to applique onto the solid block.


Here is the reverse applique block.  Actually, I don't know if that is a real thing, but that is what I am calling it.  I decided to cut the shape out of the block to show the fabric beneath instead of the usual method of applique where you sew a shape onto the background.  I stitched around the outside of the shape and plan to leave the edges raw to add texture.  I think it will look better when washed.


Here is the regular applique block.  I think I like the contrast of the fuzzy flannel block with raw edges and the smooth cotton block with the clean, finished look of the traditional applique. Opposites!


And here are the rest of the fabrics...soon to become blocks.  I can't wait to get this done and give it to tiny, cute, precious Owen! I meant to get it done before he was born, but it just didn't happen.

Friday, July 9, 2010

Cole's Robot Quilt


I know it has been a long time since I have posted anything, but I finally have something to show for myself! I had great intentions of posting updates on this quilt as it went, but I was sick for a couple weeks, traveled, had guests at our house, etc, etc and never got around to it. So here is the finished product. It is a baby quilt for my friend who just had a baby boy. Their theme is robots, so I thought David Walker's Robots was an obvious choice. The pattern is my own. I did applique planets and rockets in the 4 corners and a big robot in the center - all inspired by the fabric. The shapes are free-hand, so not perfect, but I was pretty happy with the result.


Wednesday, October 7, 2009

Mini quilt mouse pad tutorial - scrap buster!


I have been wanting to make a new mouse pad for work for a while, and I have been wanting to make a blue and green themed quilt, and I wanted to participate in Sew, Mama, Sew's Scrap Buster Contest, so this seemed like the perfect project!

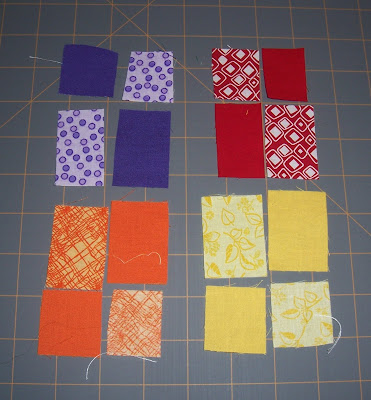
I started out with this pile of scraps from the baby quilt I made a while ago.

The strips that I cut for the baby quilt were all just a little too long, so when I trimmed them I ended up with relatively regular sizes of scraps of each color. I had a small rectangle of each of the solids and prints (about 1.5 x 1.25 inches) and a large rectangle of each (about 2 x 1.25 inches). I realized that these would make nice mini blocks without having to do any additional cutting, so a plan began to take shape!
You will see throughout a lot of these pictures that I have 3 extra mini blocks in warm colors. I was going to use them for the back, but didn't like it in the end after I chose the binding, so just ignore those extras! I used 9 mini blocks for my project. It is bigger than a normal mouse pad, but that lets you actually see the blocks. If you wanted to make it smaller you could use fewer mini blocks.

Start by sewing the two small rectangles together and the two large rectangles together using a 1/4 inch seam. Then press the seams either to one side or apart. There are great debates about which is better. I don't claim to know which is better or to do it consistently, so you should do whatever you prefer.
Next, sew the small rectangles to the large rectangles with a 1/4 inch seam and press open.

Since my scraps were not exactly the same size (and because I don't always sew perfectly straight) I trimmed them up to make them approximately 2 x 3 inches.

I also had some strips of white sashing left over from the same baby quilt that were about 2 x 7 inches so I cut them in half and used them as sashing between the mini blocks (again using a 1/4 inch seam and pressing the seams).

I wanted to make it more square so I used 1.25 inch wide strips between the rows. As I mentioned before, I don't always sew straight, so for me, it is always helpful to square up my block at multiple stages. So, after putting all the blocks into rows and the rows into a bigger block I tried to make the edges straight and parallel.

I used the same 2 inch strips on the sides and then 1.25 inch strips across the top and squared up my block to be a final 10.5 x 10.5 inches.

You will also need something for the back and some batting. I used a scrap of white print cotton fabric left over from the first quilt I ever made back in college that was nearly the right size and just needed some trimming and a scrap of batting (this really was a scrap buster project!).

Cut the back and the batting the same size as the finished block. Layer them with the back right side down, the batting, and then the top right side up and pin together with safety pins.

Quilt together however you want. I outlined each of the mini blocks with white thread about 1/8 inch from the edge of the block. Then, I made a double helix - think DNA (did I mention I work in the field of genetics) to run vertically between each column of mini blocks and on the two edges.
Finally, I found the perfect fabric for the binding. It was a fat quarter that I picked up at Jo-Ann's as an impulse buy when I ran in for something else and it caught my eye in the sale bin. I cut my strips 2 inches wide for the binding. Here is a nice tutorial for quilt binding from Heather Bailey. I also really like many of the tutorials that Oh, Fransson! has here. In fact, her web site is also where I got the idea for the baby quilt these scraps came from!

Some potential modifications could be to make it smaller or to use stiff interfacing under the batting to make it more stiff like a typical mouse pad. Since it is large and my wrist rests on the edge, I haven't had any problems with it sliding around. However, if I had problems I was considering trying making dots of puffy paint on the back (kind of like those woven gloves that have grippy rubber dots on them). It had also crossed my mind that a person could use that rubber mesh looking stuff that is sometimes used to either line shelves or under rugs to keep them from slipping, but I don't think I need to do anything for this one.

Getting to see this beautiful fabric all day while I am at work really brightens my day!

Thursday, July 23, 2009

Multi-color baby quilt


My most recent craft project was a quilt for a friend who is expecting. The quilt top was inspired by Oh, Fransson's Paitbox quilt. I followed her pattern to make the blocks. The back is Alexander Henry's 2-D Zoo that I got from Sew, Mama, Sew. I got the solid fabrics from Jo-Ann Fabrics and Crafts as well as some of the prints. However, my favorites (like the block below) came from my local quilt shop, Common Threads Quilt Shoppe. I just found out that the quilt arrived today (I had to mail it) and they loved it! I was really happy with how it turned out and loved getting to pick out all the color and pattern combinations.